Table of Contents
Explosives and Trigger Systems
This article is a part of Arma 3 Asset Guides.
Setting Explosives
- Pull desired explosive into your inventory
- Use ACE Self-Interaction menu →
ExplosivesthenPlaceorAttachto vehicle or surface - Once placed/attached, use ACE Interaction again on the explosive itself to
Select a Trigger - When ready to detonate, have your ACE Interaction menu open and use the activation method.
Explosive Triggers
Pressure Plate
- Built-in trigger that activates when either stepped or driven upon.
- Self-detonating. Make sure friendlies and civs don't step on these triggers!
- Range: 0.5m (proximity-based)
M57 Firing Device
The Cellphone is a superior activation method!
- Wired trigger designed for demolition purposes.
- Use ACE self-interaction menu to detonate.
- Range: 250m
M152 Firing Device
This device (M152) does not work in Antistasi!
- Long-range wireless trigger designed for demolition and sabotage purposes.
- Uses same 3D model as M57 Firing Device in world.
- Use ACE self-interaction menu to detonate.
- Range: 5000m
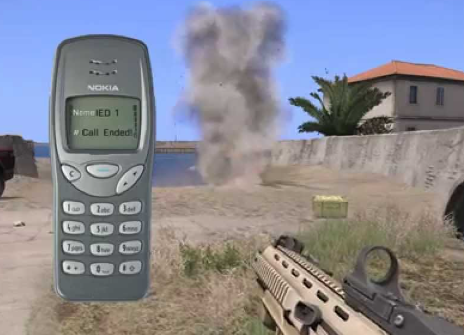
Cellphone
A savvy traveler always carries their cellphone!
- Indestructible Nokia brick phone, can detonate anywhere cell service exists
- Susceptible to EW/jamming efforts
- Use ACE self-interaction menu to open Cellphone interface. Use arrow keys to cycle through available codes or enter code on numeric keypad.
- Share ordnance with friends by providing them the 4-digit “phone number”.
- Range: Unlimited (?)
General Explosives
This section is comprised primarily of explosives which use manual triggers, and/or intended for a specific purpose.
Demolition Block
The Demolition Block, or Demo Block, is the standard explosive type in Arma 3.
Demo Blocks are used in Antistasi for breaching vehicles and armor assets with unconscious crew!
| Activation Type(s) | Manual Trigger |
| Effective Range | ~12m |
| Effective against | Light vehicles |
| Special Uses | One charge for APCs/light armor, two for tanks. |
| Notes | Useful for breaching walls and vehicles. Can destroy armor when multiple charges are used. |
Demolition Charge
The Demolition Charge, or Demo Charge, is essentially a larger version of the Demolition Block.
| Activation Type(s) | Manual Trigger |
| Effective Range | ~20m |
| Effective against | All vehicles |
| Notes | Useful for destroying structures and vehicles. |
Small IED
IEDs innocuous looking explosives which are usually hidden and used to ambush convoys. Operated by manual trigger or pressure plate.
| Activation Type(s) | Manual Trigger, Pressure Plate |
| Effective Range | ~5-10m, depending on target type |
| Effective against | Infantry, Light vehicles. Will track heavy armor and sometimes destroy medium armor. |
| Notes | Useful for destroying structures and vehicles. |
Large IED
Large IEDs are slightly more powerful with a larger range than their Small IED brethren.
| Activation Type(s) | Manual Trigger, Pressure Plate |
| Effective Range | ~10-20m, depending on target type |
| Effective against | Infantry, Light Vehicles. Will track heavy armor and sometimes destroy medium armor. |
| Notes | Useful for destroying structures and vehicles. |
M18A1 Claymore
Directional Explosive.
| Activation Type(s) | Manual Trigger |
| Effective Range | 50-100m depending on arc |
| Effective against | Infantry |
Anti-Personnel Mines
M2 SLAM Directional Mine
A directional mine able to be placed and activated on its side or bottom.
| Activation Type(s) | Manual Trigger, Proximity |
| Effective Range | 20-70m, depending on target type |
| Effective against | Infantry, Light Vehicles. Will kill infantry a narrow cone when used in side mode. |
| Notes | Cannot be disarmed. Will explode instead! |
M14
Omni-Directional Mine
| Activation Type(s) | Pressure Plate |
| Effective Range | 0.5-2m |
| Effective against | Infantry |
| Notes | Designed to maim rather than kill, this mine is also referred to as a “toe popper”. |
M26
Omni-directional Bounding Mine
| Activation Type(s) | Pressure Plate |
| Effective Range | 25-50m |
| Effective against | Infantry |
| Notes | Mine uses a small initial charge to “bound” up from the ground for an airburst explosion. |
PMR-2
Omni-directional Mine
| Activation Type(s) | Pressure Plate |
| Effective Range | 3-7m |
| Effective against | Infantry |
PMR-3
Tripwire Mine
| Activation Type(s) | Tripwire |
| Effective Range | 15-25m |
| Effective against | Infantry |
| Notes | Has a large dispersion due to being above ground. Can be blown up by vehicles crossing the tripwire. |
VS-50
Omni-directional Mine
| Activation Type(s) | Pressure Plate |
| Effective Range | 5-10m |
| Effective against | Infantry |
Anti-Tank Mines
M15
Large Mine
| Activation Type(s) | Pressure Plate |
| Effective Range | 5-10m |
| Effective against | Light vehicles, Armor |
M19
Extra-Large Mine
| Activation Type(s) | Pressure Plate |
| Effective Range | 5-10m |
| Effective against | Light vehicles, Armor |
| Notes | Strongest anti-tank mine in-game as of this writing. |
TM-62M
Large Mine
| Activation Type(s) | Pressure Plate |
| Effective Range | 5-10m |
| Effective against | Light vehicles, Armor |


